Solving image quality problems
Use the following table to help solve problems with printed pages.
See also “Solving paper feed problems” in this chapter.
Problem
Cause
Solution
Parts of the page
around the edges
aren’t printing.
The HP LaserJet 3100 product cannot
print right up to the edge of the paper. The
HP LaserJet 3100 product has minimum
margins on each edge of 0.25 in (6.4 mm).
If printing or copying, the reduction setting
may be set incorrectly.
To get the image to fit into this printable
area, you must slightly reduce the size of
the image.
For printing, check the reduction setting in
the Print window from within the program
you are using. For copying, check the
reduction setting on the control panel
(chapter 5) or from the Document
Assistant.
Images will not
print.
The HP LaserJet 3100 product may not
be plugged in.
The parallel cable may be loose.
The toner cartridge tape may not have
been removed.
Make sure that the HP LaserJet 3100
product is plugged into a live wall outlet or
power strip.
Check that the parallel cable is securely
connected between the HP LaserJet 3100
product and the computer.
Remove the toner cartridge and make
sure the tape has been removed. See
“Installing the toner cartridge” in chapter 1.
Faxes you send or
copies are too
light or too dark.
The contrast may not be set correctly.
Adjust the contrast and resolution settings
from the control panel or the Document
Assistant.
216 9 Troubleshooting and Maintenance
EN
Faxes you send or
copies are too
light.
If you are faxing or copying a document
printed on colored paper there may not be
enough contrast between the ink and
paper colors.
Adjust the contrast and resolution settings
from the control panel or the Document
Assistant. Also, if possible, use originals
printed with black ink on white paper.
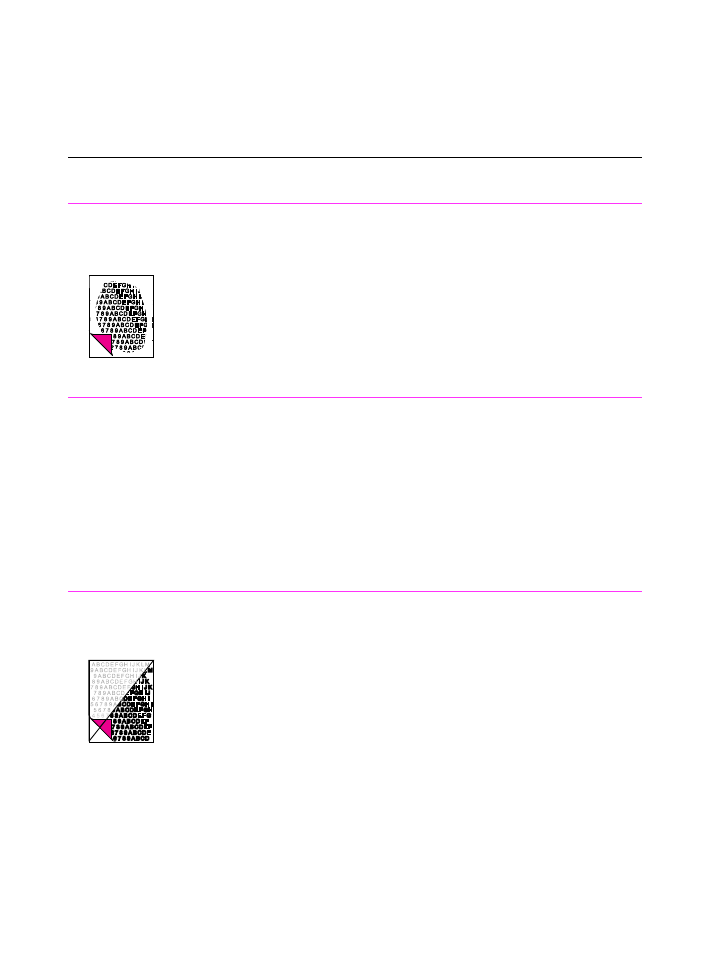
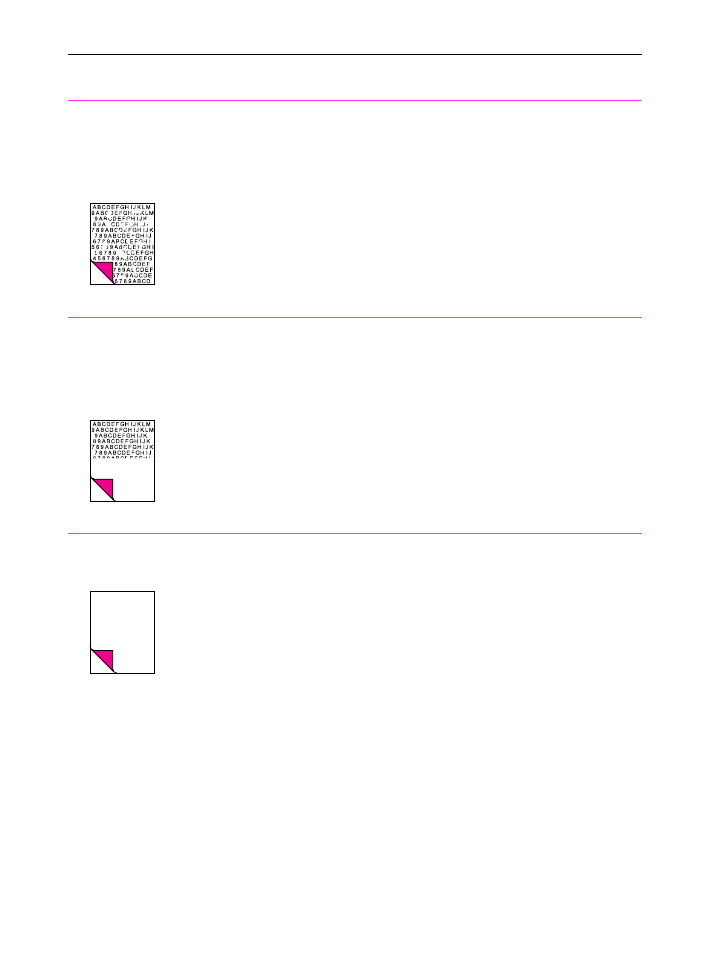
Print is faded or
you notice a block
of vertically aligned
white streaks.
The toner cartridge may be getting low on
toner.
The paper you are using may not meet
HP’s paper specifications (for example, it
may be too moist or too rough).
Toner density setting may need to be
adjusted.
A part of the HP LaserJet 3100 product
may be damaged.
See “Managing HP LaserJet toner
cartridges" in chapter 4.
Order HP’s paper specification guide. See
“Ordering parts” in this chapter.
Adjust the setting from the front panel.
Contact the Customer Service Center for
service. See the front of this manual for
support information.
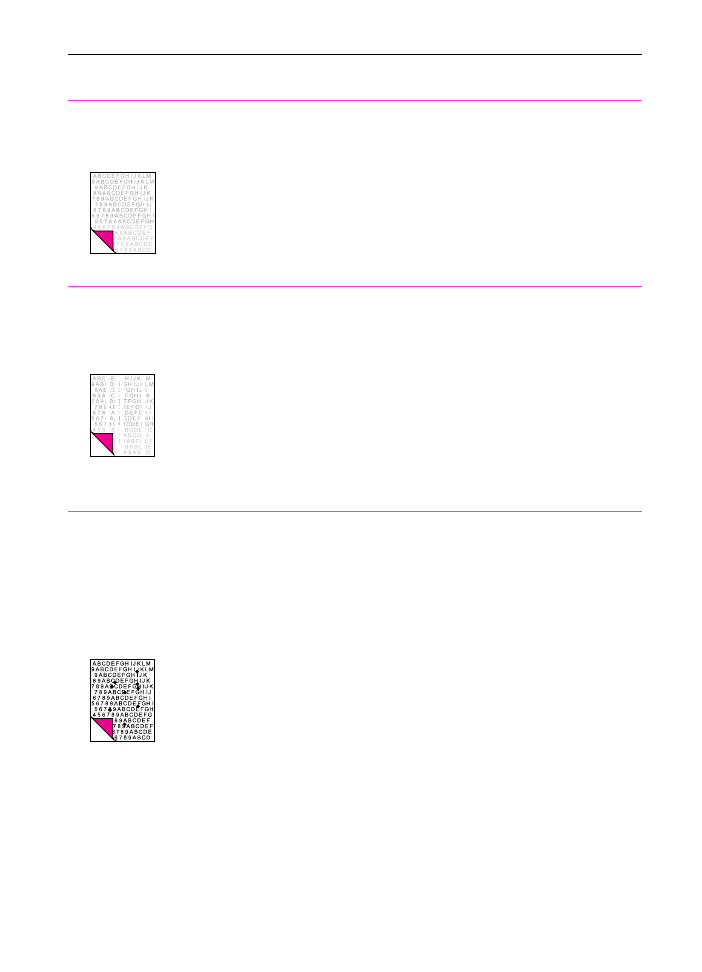
Stains or smudges
appear as small,
round, black dots
on the front or
back of a page.
Sometimes
inconsistent stains
appear.
The paper you are using may not meet
HP’s paper specifications (for example, it
may be too moist or too rough).
You may be printing on the wrong side of
the paper.
The HP LaserJet 3100 product may need
cleaning.
The toner cartridge may be damaged.
Order HP’s paper specification guide. See
“Ordering parts” in this chapter.
Remove the paper from the paper input
bin and turn it over. (The wrapper on
many reams of paper has an arrow
indicating the print side.)
See “Cleaning the scanner path” and
“Using a cleaning page” in this chapter.
See “Managing HP LaserJet toner
cartridges" in chapter 4. Replace the toner
cartridge if maintenance procedures do
not improve print quality.
Problem
Cause
Solution
EN
9 Troubleshooting and Maintenance 217
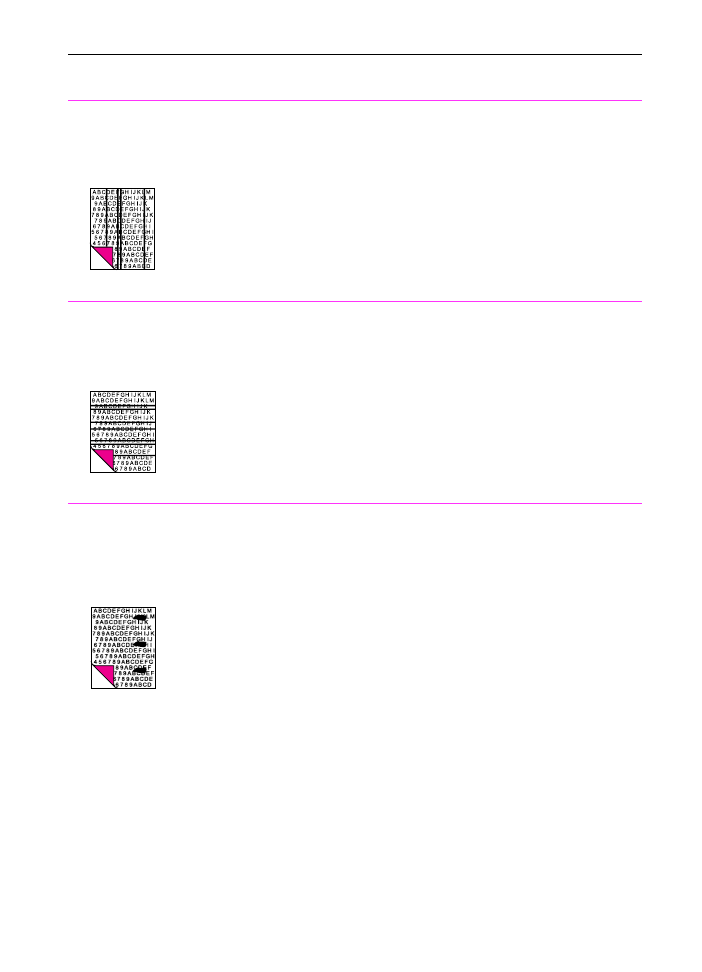
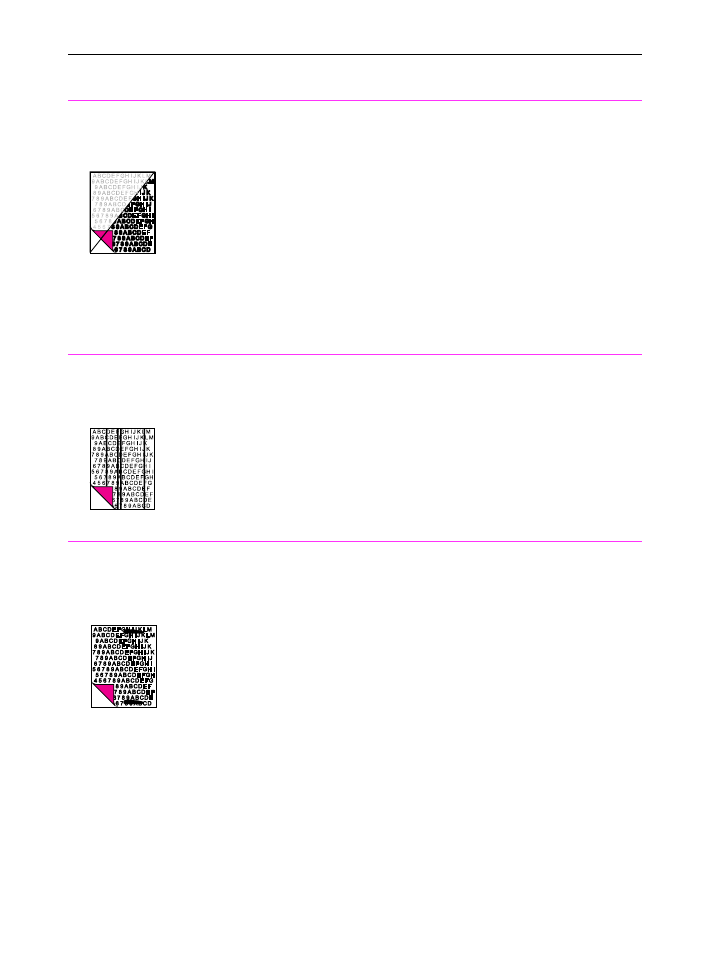
Vertically-aligned
black streaks or
smears appear on
successive pages.
The toner cartridge may be damaged.
The HP LaserJet 3100 product may need
cleaning.
See “Managing HP LaserJet toner
cartridges" in chapter 4. Replace the toner
cartridge if maintenance procedures do
not improve print quality.
See “Cleaning the scanner path” in this
chapter.
Horizontally
aligned black
streaks or smears
appear.
The toner cartridge may not be properly
installed.
The toner cartridge may be defective and
need replacing.
Make sure you removed the entire length
of the sealing tape from the toner
cartridge before you installed it. See
“Installing the toner cartridge” in chapter 1.
The toner cartridge may still be under
warranty. See “Warranty information” in
appendix B.
Light character
shadows or
repetitive marks
appear on the
page.
The HP LaserJet 3100 product may need
cleaning.
If you are using transparencies, they may
not meet HP’s specifications.
The paper’s texture may be too coarse.
The toner cartridge may be damaged,
causing a repetitive black flaw on every
printout.
The toner cartridge’s photosensitive drum
may have been overexposed to bright
light, causing repetitive defects (usually a
fuzzy black area).
See “Cleaning the scanner path” in this
chapter.
Order HP’s paper specification guide. See
“Ordering parts” in this chapter.
Try changing to a paper with a smoother
finish.
The toner cartridge may still be under
warranty. See “Warranty information” in
appendix B.
The toner cartridge may still be under
warranty. See “Warranty information” in
appendix B.
Problem
Cause
Solution
218 9 Troubleshooting and Maintenance
EN
Vertical white
stripes appear on
the page.
The scanning device may need to be
recalibrated.
The HP LaserJet 3100 product’s internal
mirror may be contaminated.
If you noticed the lines on a copy output
page or on a fax you sent to a recipient,
scan an item and see if similar lines
appear on the scanned image. (If the lines
were on the scanned image, make a copy
and check for the lines.) If similar lines
appear, see “Recalibrating the scanner” in
this chapter.
Contact the Customer Service Center for
service. See the front of this manual for
support information.
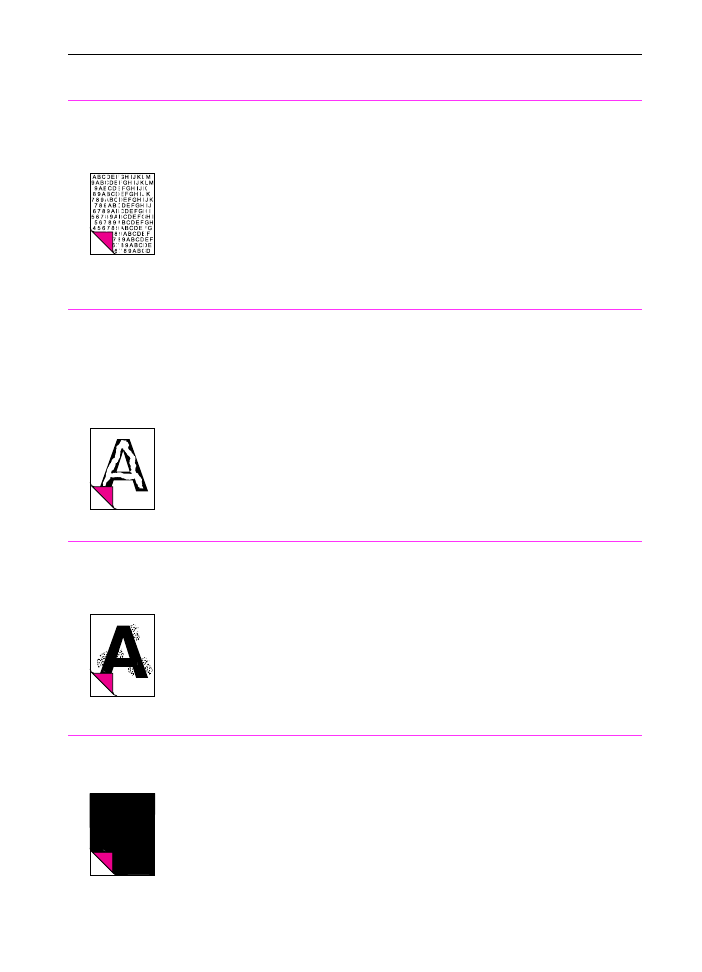
Character voids
appear (white
areas within the
parts of characters
that should be
solid black).
The paper or transparencies may not
meet HP’s specifications.
You may be printing on the wrong surface
of the paper.
Order HP’s paper specification guide. See
“Ordering Parts” in this chapter.
Remove the paper and turn it around.
(The wrapper on many reams of paper
has an arrow indicating the print side.)
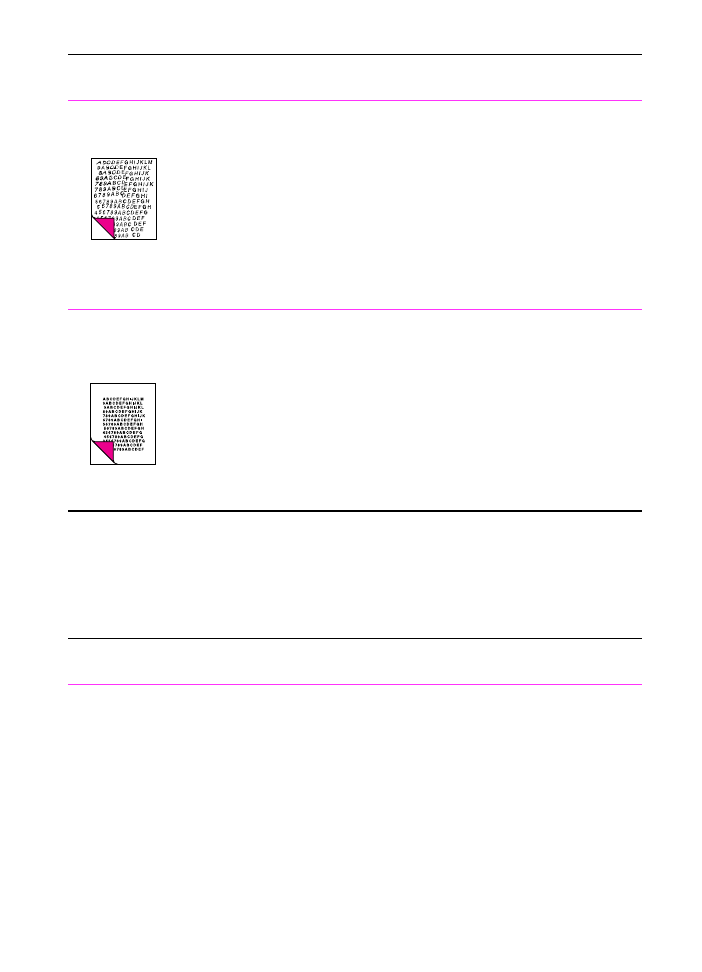
Background
scatter appears on
a printed page.
Background scatter results from bits of
toner distributed on the front or back of a
printed page. Background scatter often is
isolated to a specific area of the page.
Change the paper type, weight, or surface
finish. To order HP’s paper specification
guide, see “Ordering parts” in this chapter.
If background scatter occurs on an
envelope, try moving the text to an area
with no seams. Printing on seams can
cause this problem.
This problem may be caused by spilled
toner inside the HP LaserJet 3100 product
or the pick rollers being dirty. See
“Cleaning the print path” in this chapter.
The page is
completely black.
The toner cartridge may not be installed
properly.
The toner cartridge may be defective and
need replacing.
The HP LaserJet 3100 product may need
to be repaired if the problem continues
after replacing the toner cartridge.
Remove the cartridge and reinstall it. See
“Installing the toner cartridge” in chapter 1.
The toner cartridge may still be under
warranty. See “Warranty information” in
appendix B.
See the support pages at the front of this
manual for support options.
Problem
Cause
Solution
EN
9 Troubleshooting and Maintenance 219
Characters are
only partially
printed (also
referred to as
dropouts).
A single sheet of paper may be defective.
The print density may need adjusting.
The moisture content of the paper may be
inconsistent or the paper may have moist
or wet spots on the surface.
The paper may have been damaged by
inconsistent manufacturing processes.
Try reprinting the job.
Adjust the print density from the front
panel.
Use paper from a fresh ream or a different
source. To order HP’s paper specification
guide, see “Ordering parts” in this chapter.
Try using paper from a different supplier.
To order HP’s paper specification guide,
see “Ordering parts” in this chapter.
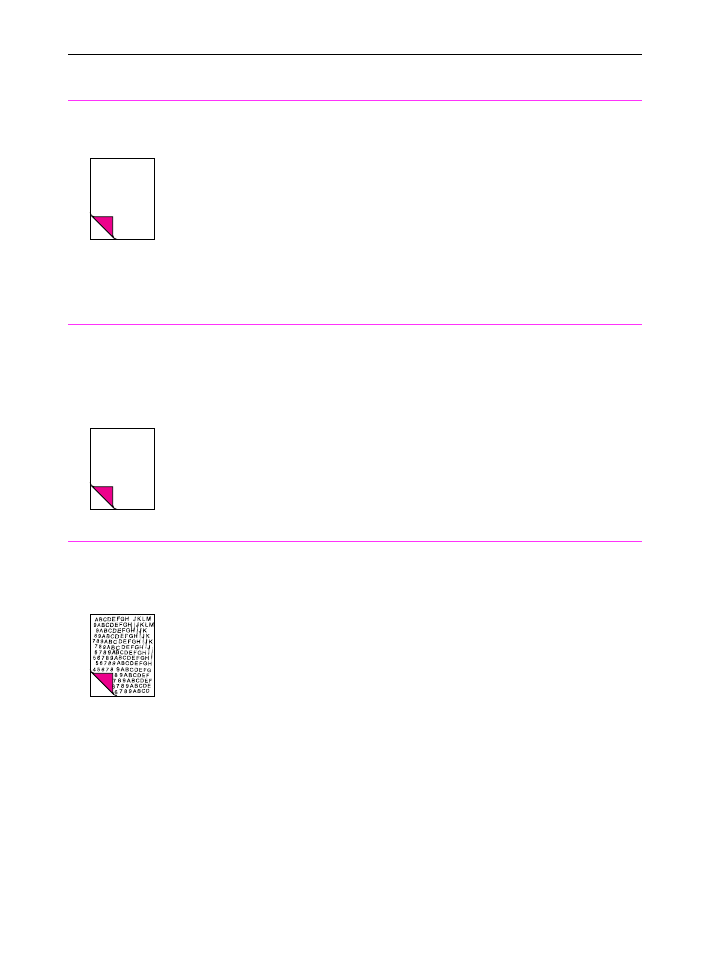
The bottom of the
printed page is
blank or part of a
graphic’s image is
cut off.
The page may be too complex. (There is
not enough memory to process the page.)
Set the resolution to 300 dpi through your
software or printer driver. See the online
help for printer driver issues.
Blank pages print
occasionally.
Page length and margins are not set
correctly for the paper size.
Your HP LaserJet 3100 product may be
feeding two or more sheets of paper at a
time because the paper is difficult to
separate.
Your software application may be sending
an extra page-eject command.
If you are printing on small paper and your
page is blank, try printing on larger paper
to see where the image is printing. Adjust
the margins accordingly.
Remove the paper from the paper input
bin and align the edges of the paper.
“Break” the ream of paper by curving it
into an upside-down u-shape; this may
decrease multifeeds. Try turning the
paper around to feed the other end first.
Check your software’s printing
configuration information. If you are using
a word-processing program, check for a
natural page break and a forced page
break that are close to each other.
Problem
Cause
Solution
220 9 Troubleshooting and Maintenance
EN
Blank pages are
always printing
The toner cartridge may be improperly
installed.
The toner cartridge may be completely out
of toner.
The HP LaserJet 3100 product may need
to be serviced.
Make sure you removed the entire length
of the sealing tape from the toner
cartridge before you installed it. See
chapter 1, “Installing the Toner Cartridge.”
Replace the toner cartridge. See
“Ordering parts” in this chapter.
Print a self-test page. See “Printing a self-
test report” in chapter 8. If the page is still
blank, see the support pages at the front
of this manual for support options.
Faxing a
document,
copying or
scanning results in
blank pages
The item may have been loaded
incorrectly.
Load the document face down. See the
procedure for loading documents in
chapter 3, “Faxing,” chapter 5, “Copying”,
chapter 6, “Scanning”, or chapter 7,
“E-Mailing Portable Documents.”
Print is misaligned
on the page
(skewed pages).
The paper input bin may be too full.
The guides may not be adjusted properly.
The paper’s weight or surface finish may
not meet HP’s specifications.
Try removing some of the paper.
Be sure to center the paper with the paper
guides. Also, verify that the paper guides
are not adjusted too tightly or too loosely
against the paper.
Print a self-test page from the control
panel or the software to verify the HP
LaserJet 3100 product is working. See
“Printing a test page” in chapter 1. To
order HP’s paper specification guide, see
“Ordering parts” in this chapter.
Problem
Cause
Solution
EN
9 Troubleshooting and Maintenance 221
Scanned images
are too light or too
dark.
The original image may be very light or
dark.
If it is too dark, the original may be on
colored paper.
The HP LaserJet 3100 product may need
recalibrating.
Adjust the resolution and/or contrast
setting(s) from the dialog box that appears
after you click Scan on the Document
Assistant.
If the original was on a colored paper,
including a brown recycled paper, the text
may not be clear. Try adjusting the
resolution, contrast, and/or brightness
settings from the dialog box that appears
after you click Scan on the Document
Assistant.
See ‘Recalibrating the scanner” in this
chapter.
Scanned images
have unwanted
lines through them.
There may be ink, glue, white-out, or
some other substance on the scanner’s
image sensor.
If you tried to scan a slick paper, the
scanner may have had trouble scanning it.
The HP LaserJet 3100 product may need
recalibrating.
For more information about cleaning the
HP LaserJet 3100 product, see “Cleaning
the scanner path” in this chapter.
Use a carrier sheet to send the item. See
“Selecting items for faxing, copying, and
scanning” in chapter 3.
See “Recalibrating the scanner” in this
chapter.
Scanned images
have black dots or
streaks in top and
bottom margins.
There may be ink, glue, white-out, or
some other substance on the scanner’s
image sensor.
For more information about cleaning the
HP LaserJet 3100 product, see “Cleaning
the scanner path” in this chapter.
Problem
Cause
Solution
222 9 Troubleshooting and Maintenance
EN